Getting started in Star Citizen can be both exciting and overwhelming for new pilots. As a massively ambitious space simulation, Star Citizen offers a vast universe (the “‘verse”) filled with planets, space stations, and countless activities. This guide will walk you through the basics—from creating an account and understanding controls to launching your first ship and discovering advanced gameplay—so you can begin your journey with confidence.
Note: Star Citizen is currently in the alpha stage of development. You may encounter bugs or performance issues, and the game is quite demanding on hardware (16GB+ RAM and an SSD are strongly recommended). Patience and persistence will go a long way in your adventure.
Referral Bonus: When creating your Star Citizen account, use the referral code STAR-33Y6-YQX9 to receive an extra 50,000 in-game credits. If you've already made an account, you have 24 hours from creation to add a referral code in your account settings to still claim this bonus! Sign up and claim your bonus.
Account Setup: Game Package and Installation
Before you can play, you’ll need to create an RSI account on the official Roberts Space Industries website and purchase a Star Citizen Game Package. A game package is required to access the Persistent Universe and comes with a starter ship, a hangar, and a small amount of starting credits. When registering, make sure you take advantage of the referral code (mentioned above) for bonus credits. Star Citizen does not require a subscription—just a one-time purchase of a starter pack will get you into the game.
Choosing a Package: The most basic starter packs come with an entry-level ship (such as the Aurora MR or Mustang Alpha) and game access. More expensive packages might include additional or more versatile ships. If you’re on the fence, know that you can always upgrade ships later or earn new ships with in-game currency, so there’s no wrong choice to start. Ensure your PC meets the minimum requirements and have the game installed on an SSD to reduce load times and improve stability. After purchase, download the RSI Launcher, install the game, and you’re ready to launch into the ‘verse!
Choosing Your Starter Ship
One of the first decisions is selecting the starter ship that comes with your game package. Each starter ship has its pros and cons, and the “best” choice depends on your playstyle. Here are some beginner-friendly ships and what they offer:
- RSI Aurora MR: A robust, jack-of-all-trades starter ship. The Aurora has an interior cabin with a bed (allowing you to log out safely) and a small cargo hold for basic delivery missions. It’s a reliable choice for new players who want flexibility, though it’s not the fastest or most combat-capable vessel.
- Consolidated Outland Mustang Alpha: A sleeker starter ship focused more on speed and style. The Mustang has a slight edge in agility and firepower over the Aurora, making it fun for early combat missions. However, it lacks an interior living space (no bed) and has limited cargo capacity. Choose the Mustang if you value agility and don’t mind the trade-offs.
- Drake Cutter: One of the newer starter options, the Cutter offers a great balance for beginners. It features a compact interior (with bed and space to move around), decent cargo capacity, and strong durability. The Cutter is easy to fly and forgiving, which can make your first hours in the game smoother.
- Anvil C8X Pisces: A tiny exploration shuttle that has become a favorite low-cost starter. The Pisces can carry a couple of passengers or some cargo, and it’s excellent for short-range trips or box delivery missions. It’s not heavily armed, but its small size makes it easy to handle. The Pisces is often included in bundle packs or as a referral bonus ship during special events.
- Origin 100i: A stylish starter ship that offers a taste of luxury. The 100i has a bed and great fuel efficiency, giving it longer range. It’s a bit more expensive as a starter, but comes with refinement and a small cargo area. If you appreciate aesthetics and efficiency over combat strength, the 100i is a solid pick.
- Aegis Avenger Titan: Often recommended as the next step up from the basic starters, the Avenger Titan is an excellent “advanced” starter ship. It isn’t usually part of the cheapest packages, but many new players upgrade to it early on. The Titan has a versatile design: a decent cargo bay, better weapons, a bed, and general-purpose capabilities that let you try a bit of everything (combat, delivery, bounty hunting) with ease.
Tip: Don’t stress too much about your starter ship choice. All ships in Star Citizen can be acquired with in-game credits. Many players start with a basic ship, then earn money in-game to buy or rent other ships. Renting ships (available at kiosks in major hubs like Area18, Lorville, etc.) is a great way to test different ships and roles before committing. Your starter ship is just that – a start. It will get you flying, and you can always switch later as you discover what playstyle you enjoy most.
Character Creation and Starting Location
Upon launching the game and clicking “Persistent Universe”, you’ll create your character’s appearance and then choose a starting location. Currently, Star Citizen offers multiple major cities as spawn locations: New Babbage (microTech), Area18 (ArcCorp), Lorville (Hurston), or Orison (Crusader). Each city has a unique environment and vibe:
- New Babbage is a high-tech city on a cold snow-covered planet (microTech) with a modern feel.
- Area18 is a bustling cyberpunk-style city on ArcCorp (a planet-wide city), known for its neon cityscape.
- Lorville is an industrial city on Hurston, recently renovated with a grand city skyline and a more utilitarian atmosphere.
- Orison is a gorgeous city floating in the clouds of the gas giant Crusader – stunning to see, but it sits far above the planet, meaning extra travel time to reach space.
For brand new players, consider avoiding Orison as your initial choice. Orison’s beauty comes with a cost: it has the heaviest performance load on many PCs and requires a longer journey (through atmosphere) to get to space. Area18, Lorville, or New Babbage are more straightforward for your first spawn and will get you into the action faster.
Lawful vs Lawless Systems: With the introduction of multiple star systems, you might also see an option to start in Stanton or Pyro. Stanton is the core civilized system with security and law enforcement, ideal for beginners. Pyro (when available) is a lawless, dangerous system with minimal security and services. It’s highly recommended that new players start in Stanton, where you can learn the ropes in a safer environment. You can always visit Pyro later when you’re ready for a challenge.
Finally, the game may prompt you to try the New Player Experience (NPE) tutorial. This optional tutorial is a guided introduction that teaches basic movement and interactions as you wake up in a city and find your first ship. If it’s your first time, it’s a great idea to play through the tutorial. You can always refer back to this guide (or other resources) after completing it. Once you finish character creation and the NPE (or if you skip it), you’ll load into the game world proper.
The First Steps: Waking Up and Basic Controls
When you first spawn in the verse, your character wakes up in a Hab (habitat) – essentially an apartment room at your chosen starting city. The game begins with you lying on a bed. Here’s how to get on your feet and moving:
- Get Up: Press the
Ykey (default keybind) to stand up from the bed. - Movement: Use
W, A, S, Dto move forward, left, back, and right (just like most games). The movement will feel like a first-person game; you can run, jump, and crouch (Spaceto jump,Ctrlto crouch). - Look Around: Move your mouse to control where you’re looking. Holding
Zlets you freelook without changing your movement direction (useful when seated in a cockpit, for example). - Interact with Objects: The
Fkey is your best friend. HoldingFenters “interaction mode,” which turns your cursor on and lets you hover and click on interactive objects (doors, buttons, panels, etc.). When you holdFand point at something interactive, it will highlight and a prompt will appear (e.g., “Open Door [F]”). Left-click while in interaction mode to confirm an action, or right-click to bring up a cursor wheel for more advanced options (or to exit interaction mode). - Doors and Exiting Hab: Find the door panel of your hab unit (usually lit or marked near the door). Hold
F, select “Open”, or simply tapFwhen the prompt appears. The door will slide open. Step out into the corridor. Congratulations, you’ve taken your first steps in Star Citizen!
While moving about, you can also use your mobiGlas (the in-game personal wrist computer) by pressing F1. The mobiGlas is essentially your in-game menu for everything: finances, contracts, equipment loadouts, star map, etc. We’ll use it later for things like accepting missions and quantum travel. For now, you can glance at it and familiarize yourself, but don’t worry if it seems complex at first.
Navigating the City and Finding the Spaceport
Each starting city is a large area, but as a new player, your primary goal will likely be to leave the city and get to the spaceport to retrieve your ship. Cities in Star Citizen are designed with signage and transit systems to help players navigate. Here are some general tips to find your way:
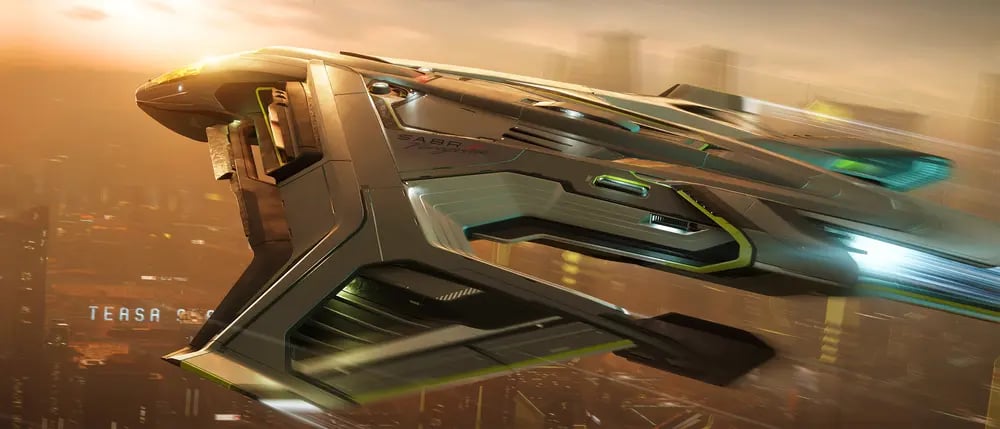
- Follow the Signs: Look for signs that mention “Spaceport” or “Transit”. In New Babbage, for example, you’ll exit your hab building into the Commons and take a tram from the Metro loop to the spaceport. In Area18, you’ll head out of your hab (ArcCorp Tower) to the CityFlight Transit terminal and ride to Area18 Spaceport. Lorville has a train (the Metro Center line) from the hab area (Leavsden Station) to Teasa Spaceport. Orison involves a shuttle transit from the hotel platform to the spaceport. Each city is different, but all have clear signage—don’t hesitate to stop and read the signs or maps.
- Use Elevators and Trams: As you explore, you will use elevators (look for elevator doors and call buttons) to move between building floors. To use an elevator, press the button (with
F), wait for the cab, enter it, and select your destination floor or location from the panel (again usingF). For city transit, board the train or shuttle and wait until it arrives at the destination (these transit rides are a good chance to enjoy the scenery!). - Ask for Help if Needed: The Star Citizen community is known to be quite helpful in-game. You can open the chat (
Enterkey), make sure you’re in the global or local channel (useTabto switch chat channels), and ask a quick question like “Hey, new player here, which way to the spaceport?” Often, someone nearby or in chat will guide you. Don’t be shy—everyone was new once. - Don’t Dilly Dally Too Long: While exploring the city is fun, remember that you have a ship waiting! Also, if you spend a very long time wandering, your character can get hungry or thirsty (yes, Star Citizen has basic survival needs). It’s not urgent in the first hour or two, but eventually you’ll want to grab a bottle of water or a snack from a vendor (by interacting with it and purchasing) if you see red thirst/hunger icons flashing on your vitals monitor. For now, you should be fine to reach the spaceport without worry.
Eventually, by following signs or transit routes, you will arrive at the Spaceport of your city. Spaceports are large facilities where ships are stored, and they typically include customs areas (don’t carry any firearms here; cities are “armistice zones” where weapons are automatically disabled), ship retrieval consoles, and elevators to hangars. Once at the spaceport, your next step is to retrieve your ship.
Summoning Your Ship and Taking Off
Spaceports have ASOP Vehicle Retrieval Consoles – basically computer terminals where you can call out (spawn) your ships. Look for screens or terminals labeled for ship retrieval (they often have a bright interface and might be in a row). Here’s a step-by-step guide to get your ship and take off for the first time:
- Access the ASOP Terminal: Approach a retrieval console and interact with it by holding
Fand clicking “Use”. This will open an interface showing a list of ships you own. With a brand new account, you’ll see your starter ship listed. - Retrieve Your Ship: Click on your ship in the list. The console will give you the option to “Retrieve” (or if the ship is stored elsewhere, it might say “Claim” – which means filing an insurance claim to have it delivered to your current location, usually instant for starters or with a short wait). Select Retrieve. The terminal will assign your ship to a hangar (or landing pad) and display a message like “Your ship has been delivered to Hangar 03”.
- Note the Hangar Number: The UI will indicate which hangar or pad your ship is in. Memorize or write it down (e.g., Hangar 3). You can also see this info in your mobiGlas if you forget, under the Vehicle app.
- Take the Elevator to Your Hangar: Nearby, you’ll find elevators leading to the hangars. Call an elevator, step inside, and look at the panel: it should list hangar numbers. Select the hangar number you were given (e.g., “Hangar 3”). The elevator will take you there.
- Locate Your Ship: Step out of the elevator into the hangar. Your ship should be right in front of you, sitting on the pad! Take a moment to walk around it and admire—this is your ship, and your key to exploring the verse.
- Enter the Ship: Different ships have different entry methods. For small ships like the Aurora or Cutter, there may be a side door or ladder. The Mustang has an open canopy you enter from above, and the Avenger has a ramp at the back. Approach the ship and look for an entry prompt. Usually, when you get near the correct spot (door, ladder, etc.), you can hold
Fand you’ll see options like “Enter pilot seat” or “Open door”. If it’s a door or ladder, open it or extend it first, then move in and interact again to get inside or into the seat. Tip: If you’re having trouble finding the entrance, circle around the ship while holdingF—interactive sections will highlight. On many ships, the entrance is on the left side (port side) of the hull, or at the back. - Get into the Pilot Seat: Once you’ve opened the ship and climbed in, make your way to the pilot’s seat (in very small ships, entering the ship might directly seat you). For ships where you can walk inside, approach the cockpit seat and press
Fon it to sit down. Now you’re in the cockpit ready to fly. - Power Up the Ship: In the pilot seat, you need to turn on your ship’s systems. You can either look around the cockpit with
Fto find the “Flight Ready” button (often on the dashboard or above you), or use the quick keybind. By default, pressing theRkey will perform a “flight ready” which powers on all systems and engines. (Some references might sayUfor power andIfor engine, butRis a simple one-button approach to get everything on.) Your HUD should light up, and various panels in the cockpit will come alive. - Contact ATC for Takeoff Clearance: In most major spaceports, you must request permission to leave (to open the hangar doors or be assigned a departure lane). Press
F1to open mobiGlas, and click the Commlink (Friends) tab — you should see an entry for the local Landing Services at the top of the list (e.g., “Lorville Landing Services” or the name of the port). Hit the “Call” button. Alternatively, there is often a hotkey (F11then navigate to Friends, or even a dedicated key in some patches) but using mobiGlas is straightforward. Once you call, you’ll usually hear a message like “You are clear for lift-off” and see the hangar roof doors start opening. - Take Off: Ensure the hangar doors are fully open above you. Now, gently lift off by holding the Space bar (this thrusts your ship upward). In a hangar, just go straight up until you clear the doors. Use
W, A, S, Dto strafe your ship forward/backward and sideways, and move the mouse to pitch/yaw. Once you’re out of the hangar, retract your landing gear by pressingN(your ship flies better with gear up). Congratulations – you are now flying!
Basic Flight Controls: Piloting a ship in Star Citizen has a learning curve, but basic controls are similar across all ships:
Waccelerates you forward,Sslows you down (or thrusts backward if in decoupled mode), andA/Dthrust left/right.- Mouse movement controls your ship’s nose (pitch and yaw) by default. Q and E keys roll the ship left or right.
- The mouse wheel adjusts your speed limiter. Scrolling up lets you go faster, but be cautious: high speeds make maneuvering harder and can lead to collisions. Keep it moderate until you’re in open space.
- Hold
Shiftto engage afterburner for a burst of speed (useful to quickly accelerate or evade, but it generates heat). - Press
Cto toggle cruise control (which will try to maintain your set speed without constant input). - If your ship has VTOL thrusters (Vertical Take-Off and Landing mode), pressing
Kcan toggle them (mostly relevant for specific ships in atmosphere). F4switches to third-person camera, and holdingZwhile in third-person lets you freely look around your ship. This can be useful to orient yourself or enjoy the view. Press F4 again to cycle camera views back to first-person.
By mastering these controls, you can navigate your ship around planets and in space. Start with gentle movements until you get a feel for the handling. Now that you’re airborne, it’s time to go somewhere and start your journey proper.
Flying in the ‘Verse: Quantum Travel and Navigation
Space is huge, so Star Citizen provides Quantum Travel to cover vast distances quickly. Quantum travel is essentially a form of super-cruise drive that lets you hop between planets, moons, and space stations. To use it, you’ll use your mobiGlas and onboard systems:
- Setting a Route: While in your ship, press
F2to open the Starmap (Skyline) on your mobiGlas. You’ll see a 3D map of the star system. Use the mouse wheel to zoom and drag to rotate the map. Locate your destination – for example, if you’re at Lorville and want to go to the orbital station Everest Harbor, find Hurston planet and then Everest Harbor icon, or if you want to go to another planet like Port Olisar at Crusader. Click the destination, then click “Set Route”. The map will plot a quantum route (if it’s within range and you have enough fuel). Exit mobiGlas. - Spooling and Calibrating: Now, to initiate the quantum jump, press the
Bkey. This spools up your quantum drive. You’ll see a marker on your HUD for your target, along with a percentage indicating calibration. Align your ship so that the target marker is in the center of your view; when you’re aligned correctly, the calibration will progress to 100%. - Engage Quantum: Once calibrated, a “Hold B to Quantum” prompt will appear. Hold down
Band your ship will enter quantum travel towards the destination. Enjoy the tunnel-of-light effect during transit. Most short hops (to orbital stations or nearby moons) take seconds, while longer trips (planet to planet) could take a minute or two. - Stopping/Adjusting: If you need to cancel a quantum travel mid-flight (for example, if you overshot or want to stop early), you can press
Bagain to stop. You can also quantum travel to intermediate waypoints or in multiple jumps if needed (the routing system usually handles this). - Refueling Quantum Fuel: Quantum jumping uses quantum fuel. Don’t worry about this too much as a beginner – your starter ship has enough fuel for multiple trips around the system, and you can refuel at stations when you land. Just be aware that super long journeys might require a pit stop. Keep an eye on your fuel levels on your HUD (usually shown as a percentage for Quantum Fuel).
Aside from quantum travel, you can also navigate in normal space to explore local areas. Points of interest (like mission locations, caves, wrecks) might be too close to quantum to jump directly, so you’d QT to the nearest marker and fly manually the rest of the way. Use your Ship Scanner (tap V to ping and reveal nearby markers or objects) if you’re searching for something specific near you.
Whenever you arrive at a destination (like a space station or another city):
- If it’s a public landing zone (city or station), make sure to request landing via mobiGlas Comms (similar to requesting takeoff). They’ll assign you a pad or hangar.
- Fly gently into the marked hangar or onto the indicated pad.
Nlowers your landing gear again, and you can either manually set down or use an auto-land feature (Hold Ninitiates auto-landing when you’re above the pad and velocity is low). - Once landed, power off your ship (
Ukey will turn off engines and power). You can then get out of the seat (Yto stand up) and exit your ship. - At stations and cities, it’s wise to store your ship after landing by interacting with a nearby terminal or through the ATC comm again. This ensures it’s safely put away and won’t be left out to incur storage charges (a minor fee if you leave ships on pads too long) or be vulnerable to damage.
Mastering travel and navigation will open up the entire Stanton system (and beyond) for you to explore. Now that you can fly and reach places, let’s look at how you can earn money and make the most of the gameplay.
Missions and Earning Credits
Earning aUEC (Alpha United Earth Credits, the current in-game currency) is an important part of progressing. As a new citizen, you start with some credits (plus the 50,000 bonus if you used the referral code). Those credits can buy you equipment, armor, weapons, and even be saved toward new ships or vehicle rentals. The primary way to earn more aUEC is by taking on missions (contracts) or jobs within the game. Here’s how to get started with missions:
- Using the Contract Manager: Press
F1to open mobiGlas and navigate to the Contract Manager tab (usually an icon that looks like a clipboard or list). Here you’ll find missions categorized by type: General, Personal, etc. As a beginner, focus on General missions; these are offered to anyone and usually straightforward. Personal missions are often given by in-game characters and sometimes involve more risk or criminal activity (probably not ideal for your first day). - Recommended Mission Types for Beginners:
- Delivery Missions: These are great starter missions. You’ll be asked to pick up a package at one location and deliver it to another. They pay a modest amount but teach you the basics of navigation, landing, and interacting with objects. With a ship like the Aurora (with interior space) or Cutter, you can carry the boxes easily. Even in a Mustang (which lacks interior space), there’s an external storage compartment for small packages. Just be careful when landing and taking off with cargo.
- Investigation/Recovery Missions: These might ask you to investigate a missing person or recover black boxes from a wreck. They often involve EVA (spacewalking) or exploring a derelict ship or station. They can be a bit spooky and sometimes have environmental hazards, but they’re usually low combat. These missions pay decently and let you explore points of interest.
- Bounty Hunting (Intro): You won’t see high-level bounty missions until you pass a certification, but there is usually an introductory bounty mission (to take down a very low-level criminal, often an NPC flying a small ship). If you feel comfortable with space combat and your ship is equipped with weapons, you can try a low-risk bounty. Keep in mind the Aurora and Mustang can handle basic combat, but it might be challenging. Upgrading to a better ship or improving your weapons will help if you want to pursue combat missions regularly.
- Mercenary and Combat Service: Occasionally, you’ll see mercenary missions like defending a site from NPC attackers or security guard detail. These can involve FPS combat or ship combat. For absolute beginners, tread carefully: if you haven’t yet gotten weapons and armor, or aren’t familiar with FPS controls, you might want to come back to these later. That said, some mercenary missions (like those at security post or bunker) can be done with just a pistol and savvy use of cover, if you’re up for a challenge (and have bought at least a basic armor set and medpens).
- Accepting a Mission: Click on a mission in the Contract Manager to see its details, payout, and any specific instructions. If it sounds good, hit Accept Offer. The mission will then track in your Accepted tab, and often you’ll see a waypoint or marker appear in your HUD guiding you where to go.
- Completing Missions: Follow the marker to the location (quantum travel or fly as needed), and carry out the task. For deliveries, you’ll go to a pickup terminal (often marked by a distinct icon) to get the box (use
Fto grab it), take it into your ship, then fly to the drop-off location and drop the box in a similar deposit slot. For bounty, you’ll quantum near the target area and look for a red marker (enemy ship) and engage it. For investigations, you might land at a site and go on foot to find clues or retrieve an item (using your flashlightTin dark areas helps). - Getting Paid: Once the mission objective is complete (e.g., package delivered, target eliminated, item retrieved), you’ll typically receive a notification of mission success and the payment will be deposited to your aUEC balance automatically. You can check your balance in mobiGlas (bottom left) anytime or in your journal after completion.
Early on, stringing together a few delivery missions can quickly familiarize you with traveling around the system and landing at various outposts, while padding your wallet to buy some better gear. Don’t be afraid to take breaks between missions to explore or practice flying. And remember, you only pay in-game money when you buy something or incur a fee (dying doesn’t make you lose money directly, though you might drop carried items). So, feel free to try different missions to see what you enjoy.
Suit Up and Survive: Personal Equipment and Survival Tips
Surviving in Star Citizen’s universe isn’t just about not crashing your ship – you also have to manage your character’s health and status. Here are some key survival tips for new players:
- Wear a Spacesuit and Helmet: When you first spawn, you’re usually wearing casual clothes inside a safe zone. Before you leave the spaceport or go EVA (extravehicular activity), make sure to equip a spacesuit and helmet. Without a helmet, stepping out into a vacuum (or even a thin-atmosphere moon) will cause you to suffocate in seconds. You can equip gear by pressing
Ito open your inventory and dragging items onto your character. Each city spawns you with a basic flight suit and helmet in inventory. Double-check you have your helmet on (you’ll see an oxygen timer in your HUD if you’re in a vacuum). If you ever find yourself taking damage for no obvious reason, make sure you didn’t accidentally remove your helmet! - Health and Injuries: Your health is shown in the bottom left of your HUD. You have a finite amount of health for head, torso, and limbs. Getting shot, falling, or colliding can injure you. Always carry a MedPen (medical pen) or two. These are small injectable medi-gel sticks that instantly heal you when you use them (
Cis the default quick use key for a MedPen, when equipped). You start with a couple by default; you can buy more at pharmacies or shops in cities. For more serious injuries (broken limbs, low health), you may need to visit a hospital (each major city has one, and some space stations have medical facilities) or use a medical tool (advanced gadget) if you have one. - Managing Hunger/Thirst: Star Citizen has light survival mechanics. Over time, your character will get thirsty and hungry (indicators appear on the bottom left). This won’t be a major issue for a short session, but after several hours you should eat or drink something. Every city has food courts or vendors (e.g., kiosks, bars, coffee stands). To eat or drink, buy an item, inspect it in your inventory, and use it. Keep a bottle of water and maybe a snack in your ship or backpack for long journeys.
- Local Inventory vs Personal Inventory: Each location (planet or station) has a local storage that you can use to stash items. Your Personal Inventory (accessed with
I) is what you carry on you or in your backpack. Items in local storage won’t transfer with you when you go elsewhere, but they’re safe even if you die. It’s a good idea to store valuables or extra ammo/medpens in the local inventory of a station or city you frequent, so that if you have an accident you don’t lose them. If you die far from where you set your spawn, you’ll respawn at the last major hub and might need to reclaim your items from your corpse (if possible) or re-equip from spares. - Respawning and Medical Care: If your character dies (from combat, ship crash, etc.), you’ll respawn at a hospital in the last city or station where you have a regeneration imprint. By default, that’s your starting city’s hospital. You can set your regen location to a different facility by visiting that location’s hospital and interacting with the regeneration terminal (for example, many players set their spawn at a space station like Port Olisar or Everus Harbor for convenience, since those have easy access and no trains). After dying, you wake up in a hospital gown; you’ll need to reequip your gear (either retrieve your items from where you died if possible, or gear up with spares from inventory).
- Crime and Law: Be mindful of your actions in the verse. Certain behaviors can earn you a CrimeStat (criminal rating). For example, attacking other players, shooting neutral NPCs, trespassing in restricted areas, or even accidentally hitting a security ship with stray fire can flag you as a criminal. As a newbie, it’s best to stay on the right side of the law until you learn the game. If you do get a CrimeStat, security turrets and bounty hunters may come after you, and if you’re killed with an active CrimeStat, you’ll respawn in a prison to serve time (yes, there’s a prison gameplay loop!). You can reduce CrimeStat by hacking a security terminal (advanced and risky) or just waiting out your sentence. Avoiding crime in the first place will make your life easier, so follow mission parameters and don’t shoot everything in sight.
- Logging Out Safely: When you’re done playing, it’s wise to log out from a safe location. Either land at a station or landing zone, get out of your ship and store it, then log out from the menu (this ensures your character will wake up at that location next time). Alternatively, if you’re out in space or far from a base, you can log out in the bed of your ship (enter bed, then choose Log Out) – this attempts to safely save your location. Bed logouts work most of the time as long as you’re far from other players or not in combat. If you log out without doing these (say you crash or force quit), the game will try to respawn you at the last known safe location, which could be the last station you visited or your starting hab.
By following these survival tips, you’ll significantly improve your quality of life in the verse and avoid common newbie pitfalls (like the classic “forgot my helmet, now I’m suffocating” scenario).
Beyond the Basics: Expanding Your Gameplay
Once you have the basics down and a bit of money in your account, Star Citizen truly opens up. There are a variety of career paths and activities you can explore as you become more confident:
- Trading and Cargo Hauling: If you enjoy the idea of being a space trucker, you can buy commodities at one location and haul them to sell at another for profit. This requires some starting capital and a ship with cargo space. Your starter can handle small quantities, but ships like the Drake Cutlass Black or MISC Freelancer are popular beginner cargo haulers when you upgrade. Keep in mind cargo running has risks (pirates or price changes) but can be rewarding.
- Mining: Fancy digging up precious minerals? Star Citizen offers mining gameplay both on foot and in ships. The MISC Prospector is a single-seat mining ship that lets you fracture and collect ore from asteroid or moon surfaces. You can rent one in-game to try it out. There’s also hand-mining of small crystals using a multi-tool with a mining attachment (which you can purchase from shops like mining stores in Levski or Lorville). Mining is a more slow-paced, Zen activity that can be quite lucrative for beginners once you learn how to scan and refine materials.
- Bounty Hunting and Combat Missions: As you upgrade your ship’s weapons or acquire a more combat-oriented ship, taking on higher-tier bounty missions becomes feasible. There are multiple levels of bounty certifications you can attain by completing missions, which unlock more difficult (and higher paying) targets. Additionally, mercenary missions like bunker raids (taking out NPC enemies on the ground) or defending settlements become easier with better gear. If dogfighting is your thing, work your way up to ships like the Anvil Arrow, Gladius, or even larger gunships for some serious firepower.
- Salvage and Recovery: Introduced in later patches, salvaging allows players to strip material from wrecks using ships like the Drake Vulture or Aegis Reclaimer. As a beginner, you might not own a salvage ship yet, but keep an eye out for wreck sites; you can still scavenge loose items or use a hand-tool to salvage small pieces. In the future, you might try out salvage missions or piracy (if you lean to the outlaw side) for profit.
- Exploration and Missions: With an ever-expanding universe, exploration gameplay is on the rise. There are caves to spelunk, hidden wrecks to find, Easter eggs, and beautiful vistas across moons and planets. You can undertake delivery missions that take you to far-flung outposts, or simply make your own journey to visit landmarks (like the wreck of the Star Runner on Daymar, or the huge scrapyard on Hurston, etc.). Take screenshots, enjoy the scenery, and maybe discover something few have seen.
- Medical and Rescue Gameplay: You can equip a medical gadget (or fly a dedicated medical ship like the Apollo or Cutlass Red) to rescue other players. Even as a newbie, carrying a Medical Gun or even just extra MedPens can allow you to revive a fellow player who went down. The game’s community often responds to distress calls: there are groups who volunteer to rescue stranded or injured players (sometimes called “med runners”). As you progress, you might try being a medic for hire.
- Multi-Crew and Organizations: Star Citizen is best experienced with others. You can invite friends (or make new ones in-game) to join your ship’s crew. Multi-crew ships have turret seats, co-pilot roles, etc., and tackling content together (like crewed bunker missions or hammerhead bounties) is a blast. Consider joining an Organization (Org) – basically a player guild. There are orgs for every interest: trading companies, pirate bands, military roleplay, casual friend groups, etc. Being in an org or having a group of buddies means you can crew each other’s ships and share mission rewards, making progression faster and more fun.
- Dynamic Events: Keep an eye out for special server-wide events that periodically occur, such as Xenothreat (a large-scale combat event where players unite against invading forces), Nine Tails Lockdown (a siege event at a station), or seasonal events like the Invictus Fleet Week and Intergalactic Aerospace Expo (IAE). During these times, unique missions or free-fly opportunities appear, and they’re great chances to experience epic battles or try out various ships for free during the event.
Star Citizen’s depth comes from trying a bit of everything and seeing what you enjoy. Don’t feel rushed to do it all at once. The game is not “linear” – you set your own goals. One day you might haul cargo to build your nest egg, another day you might accept a combat mission for the thrill of it. Over time, you’ll accumulate weapons, ships, and knowledge that make tougher challenges accessible.
Joining the Community and Finding Help
As a new player in a vast universe, remember that you’re not alone. The community around Star Citizen is one of its greatest assets. Here are some ways to connect and get help if you need it:
- In-Game Chat and Guide System: The global chat (
Enterto talk) is a quick way to ask simple questions. You’ll often get quick tips from veterans if you’re confused about something. Additionally, CIG (the game developers) have a Guide System on the official website called the Welcome Hub, where you can request a session with a volunteer veteran guide. Through the Guide System, you can specify what you want to learn (e.g., “basic flying”, “mining”, “FPS combat”) and it will pair you with a player who’s offered to teach newbies. It’s a fantastic resource if you prefer hands-on learning. - Spectrum and Forums: The official forums (Spectrum) and community Discords are full of knowledge. If you encounter a bug or need advice, a quick search online often pulls up answers on Spectrum or Reddit (
/r/starcitizen). Just be mindful that the game updates frequently, so ensure advice is up-to-date for the current patch. - Online Guides and Videos: Many content creators produce beginner tutorials, ship reviews, and guides for each patch. If you’re a visual learner, watching a “Star Citizen beginner guide” video or two can reinforce what you learn here. The official YouTube channel also has helpful tutorials demonstrating landing, quantum travel, mining, etc.
- Persistence and Wipes: Note that as an alpha, occasionally (often between major patch milestones) the developers reset the servers (a “wipe”), which can reset characters’ money and assets. Don’t be discouraged if this happens – it’s part of testing, and everyone starts fresh on equal footing. Take it as an opportunity to refine your approach now that you know more. Also, minor patches sometimes introduce new bugs; staying involved with the community (like reading patch watch notes or following announcements) will keep you informed on known issues and workarounds.
- Have Fun and Embrace the Chaos: Things will go wrong – you might clip through a ship, get blown out an airlock, crash due to a glitch, or get lost in a city’s back alleys. It’s all part of the Star Citizen experience. Use these moments as stories to share. The unexpected often makes the best memories in the ‘verse.
Final Thoughts
Welcome to Star Citizen and the incredible journey ahead. This guide has covered the fundamental steps to get you from a fresh spawn to a budding spacefarer: setting up your account with a bonus referral code, picking your starter ship, learning to navigate and fly, and taking on your first missions. Remember that every expert pilot in Star Citizen once started in your shoes, confused by the elevator or struggling to find the flashlight key. With practice, you’ll soon fly and operate with confidence.
Star Citizen is constantly evolving, with new features and improvements rolling out in updates. Stay curious and adaptable. Whether you dream of being a fearsome bounty hunter, a savvy trader, an explorer charting nebulae, or just want to experience the stunning vistas at sunset on an alien moon – there’s a place for you in the ‘verse. So grab your helmet, power up your ship, and launch into the stars. Fly safe, have fun, and I’ll see you in the ‘verse!